

With a return to spring and the start of our summer courses beginning, we’ll be looking at some woodland and hillside skills over the next few months on the BCS Blog.
Fire lighting is a very important skill to prac 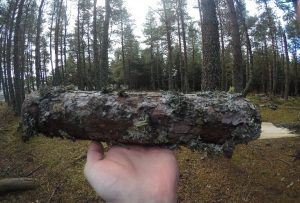 tice and be efficient with, as it could well save your life in a survival situation. I got thinking, I can light a fire in the woods with an abundance of wood at my disposal but what if I got in a life-threatening situation somewhere and there is barely or even no wood at all. I am a very keen Mountaineer and Munro bagger and I spend a lot of my spare time up in the hills where the tree line usually disappears about 600m. So, I decided to practice lighting a fire with just one piece of wood. Despite the title of this article being ‘One log fire’, it doesn’t have to be a log, it can be any one piece of wood. An example of this could be using petrified wood when you are up above 600m where there is next to nothing at your disposal. The picture below shows a piece of pine that I used for my Tinder, Kindling and Fuel. If you were venturing up higher than the tree line you could easily grab a small log and put it in your daysack if you were planning on having a small fire in the evening.
For this task, you will only need a knife and a Fire Steel, the first thing you want to do is ensure the knife you are 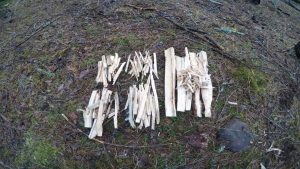 going to be using is sharp and in good working order. You then want to remove any bark from around the log, bark tends to hold moisture so removing it will make your life easier in the long run. Once the bark has been removed you want to find a decent Stick that can be used to baton the wood into the relative sizes needed. We still follow the size rule of Match stick, Pencil, Finger, Thumb and Wrist. This will obviously depend on the size of log used but the process of smaller pieces to larger should always be followed. As shown below, this is what your log will look like once you have finished the processing stages. I found that getting match stick thickness pieces from the log was tricky, so I opted to shave part of the log to get a decent pile of dry shavings to use as my tinder/ matchstick thickness sticks. The picture below right shows you the shavings rested on a platform which was also made from the original log. Some people will prefer using feather sticks to get the fire going and this will also work. You should go out and try both methods and see what works best for you. The picture below left shows you a few feather sticks which could also be used.
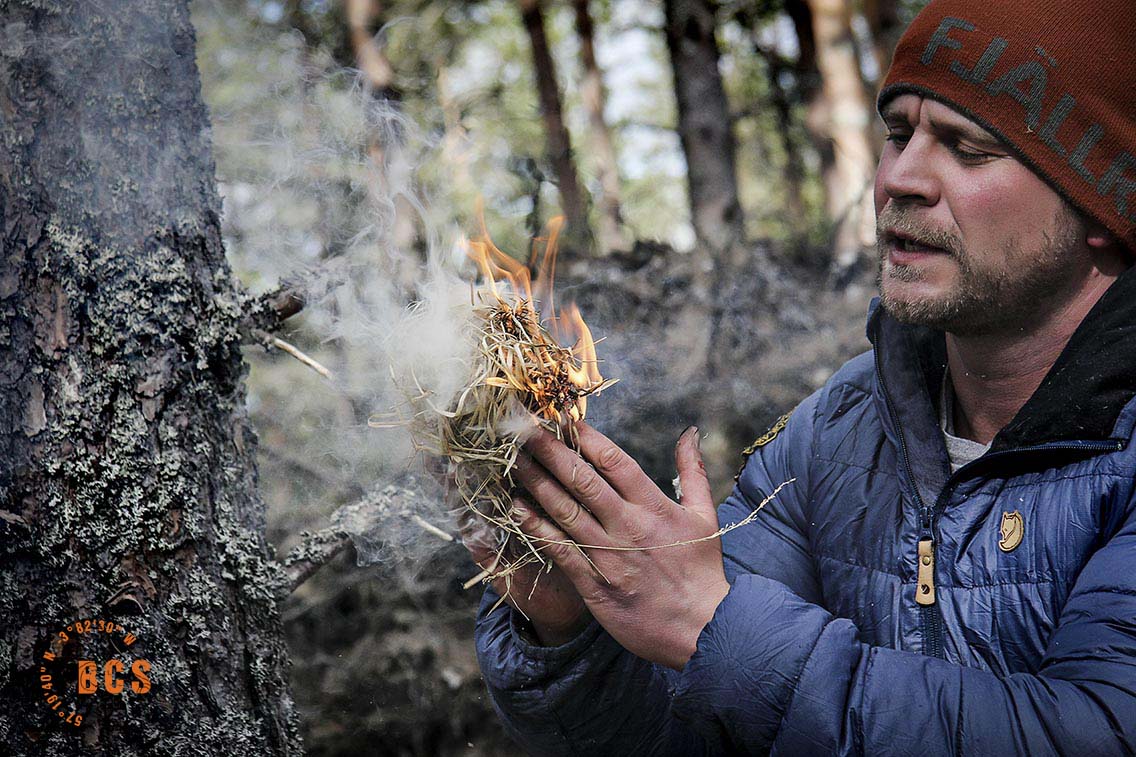
Ensuring you have followed the 7 P’s before lighting your tinder will give you the optimal chance of being successful. For those who haven’t heard of the 7 P’s they are Prior Preparation and Planning Prevents Piss Poor Performance. This couldn’t be more true when it comes to fire lighting – LAZINESS KILLS. Once you are happy you have got all you need to get this fire going grab your Fire steel and ignite your Tinder.
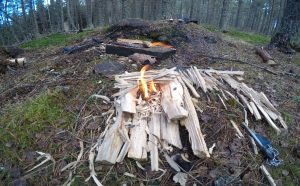
As the picture below shows, I got the tinder ignited and used two of my platform pieces of wood to help me place the next stage of wood required for the fire to continued thriving. The raised platform helped me to not cancel out one of the key ingredients when playing with fire and that is OXYGEN. The process becomes a lot easier once you have the fire started it is just a case of following the thickness guide until you have a sustained fire.
NOTE; If you are on the hillside you can add pieces of dry heather to the fire to get a longer lasting fire. If you do plan on having a small campfire above 600m ensure the area you chose to light it on isn’t over dry heather or on top of Peat bogs as this could lead to some serious hill fires.