

Snow-Holeing
 Be it necessity or leisure, the snow hole is in many cases the most effective form of shelter within a winter mountain environment. Yet unlike woodland shelter, there has to be a lot more judgment and understanding of the building medium and topographical features to avoid an unpleasant or in some cases be a potentially fatal experience. The snow hole has been an essential means of survival for many over the years – from indigenous communities; the famous Heroes of Telemark; to present-day mountaineers.
For myself and many others, Bushcraft is having the skills, confidence and experience to travel through and live in a wilderness setting for a prolonged length of time. The “human animal” has the ability to survive in practically any environment on the face of the planet. This greatly depends upon the careful planning of appropriate equipment – much of which has been evolved and refined over time. However, it is experience and skill, combined with this equipment, that best equip the individual to withstand the harshest of conditions.
Let’s put the need for effective shelter into context. Many have heard of the “rule of threes” a hierarchy of the essentials and time scales needed to sustain human life;
• 3 minutes without oxygen
• 3 hours without shelter
• 3 days without water
• 3 weeks without food
These rules are, of course, all circumstantial and need to be considered alongside a number of other factors. In a hostile habitat such as the Cairngorm Plateau, in the depths of winter, three hours can be an over estimate. Hypothermia can set in at an alarming rate. Technical hypothermia is the loss of a mere 2°C from your body’s core temperature. Contributing factors such as wind chill and heat loss through perspiration evaporation, will speed the process up, as water conducts heat away from the body five times faster than air. When you factor wind chill into the equation, heat loss occurs twenty-five times faster than on a still day. The need for shelter is paramount!
Location, Location, Location
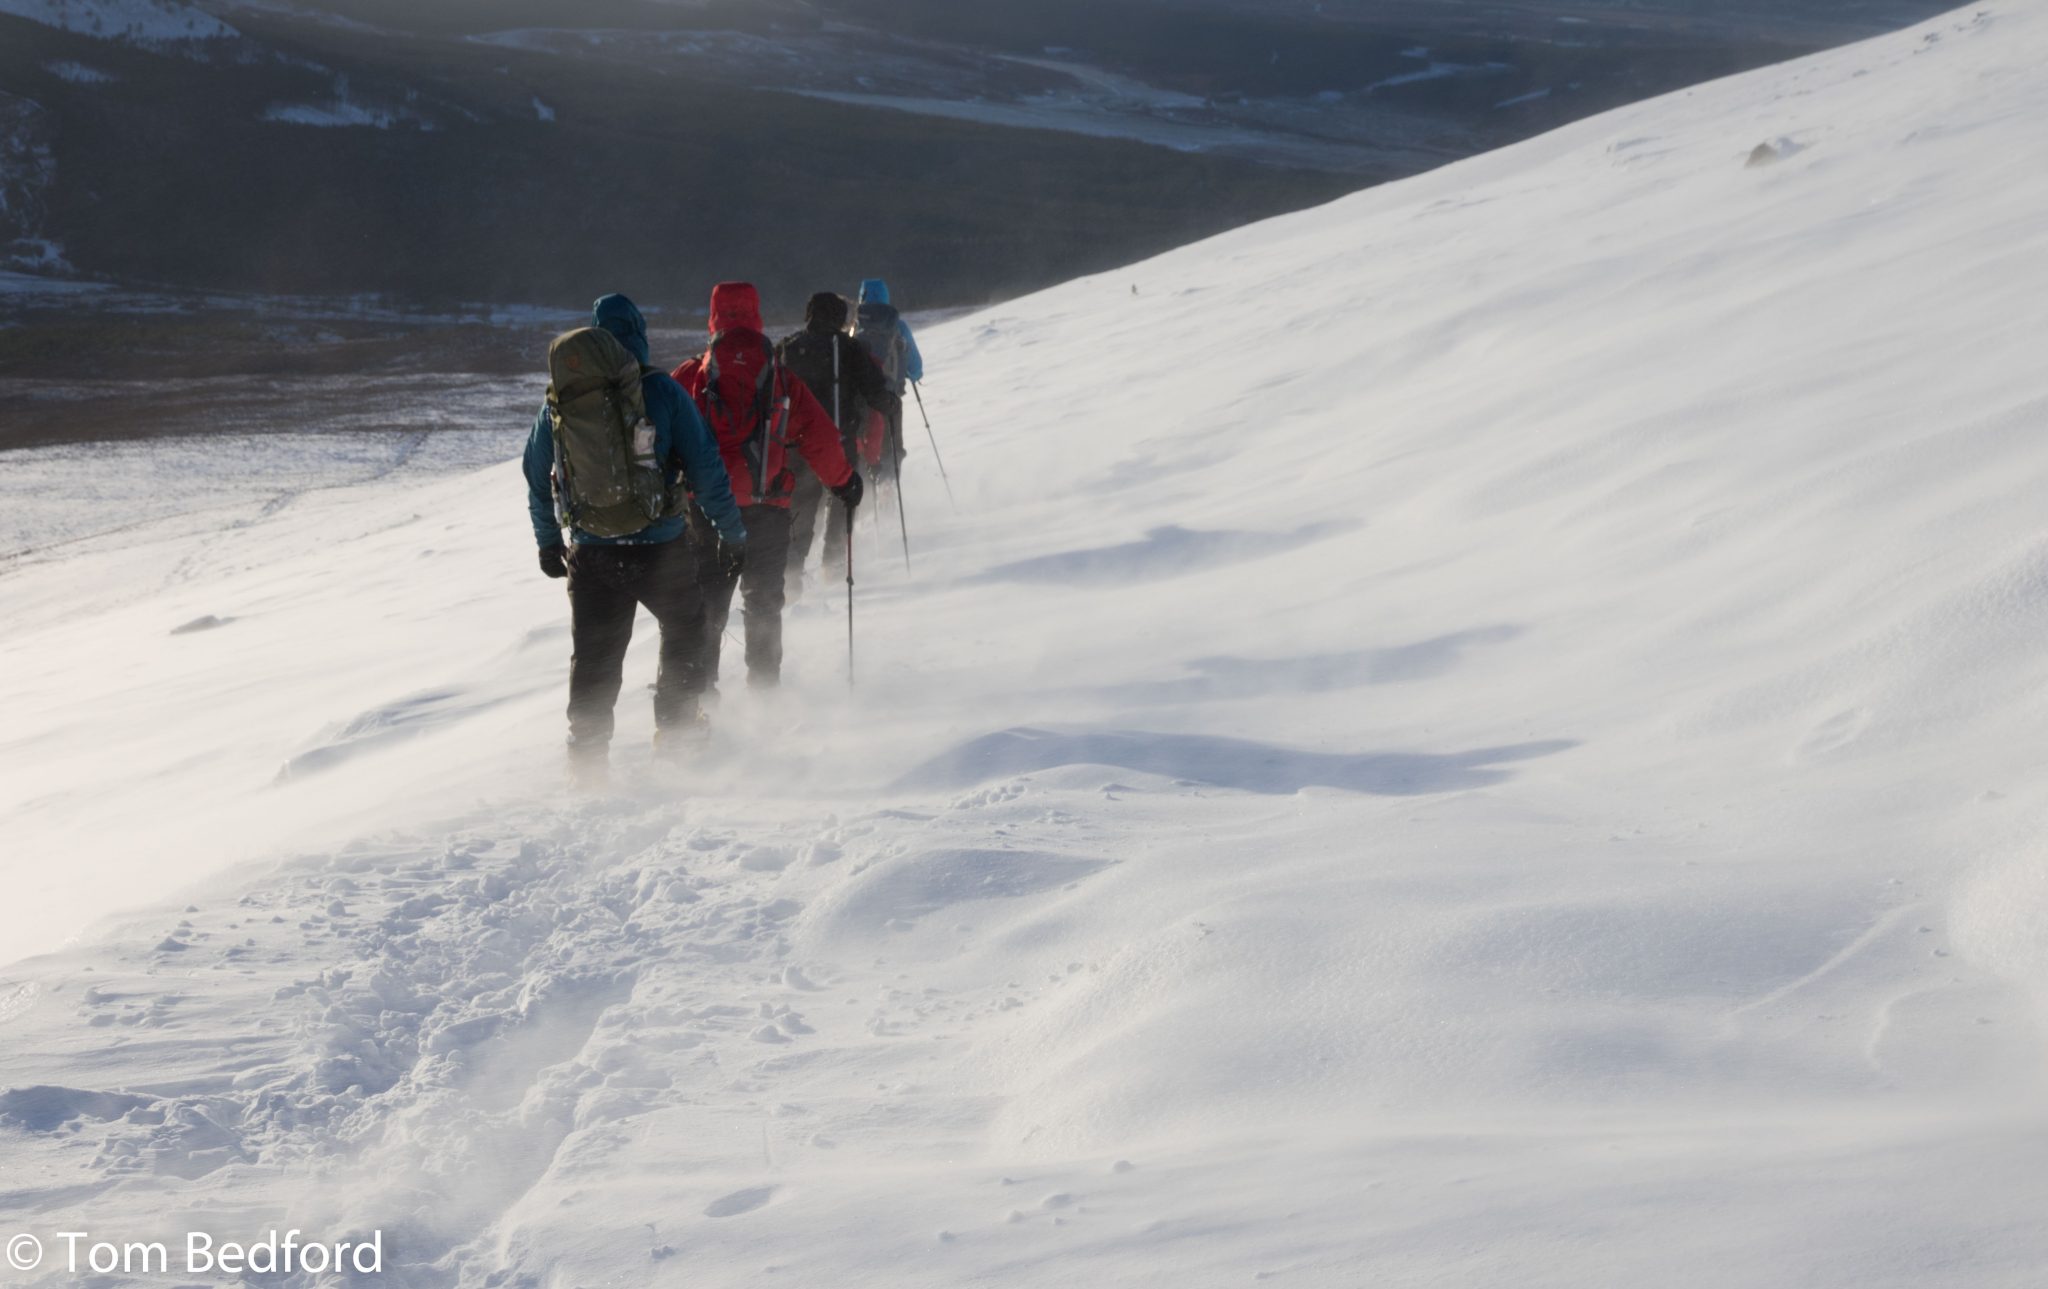
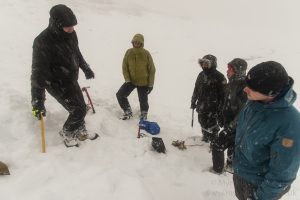
The first thing to think about is where to start excavating your snow hole. Prevailing winds are typically south-west in this country, causing wind-carried snow to lay deepest in the north-east lee (or sheltered) slopes. Snow depth of course depends on the recent wind conditions, and close attention to weather patterns should be made prior to any expedition. In Scotland, the snow can lie for up to 10 metres deep, which is ideal for excavating a snow hole. I have heard many horror stories about groups and individuals staying out for the night and digging into the snow pack, only to find that the snow depth is not sufficient to house everyone.
 Think you won’t get avalanched in Britain? Think again! Being avalanched whilst digging, or worse being buried whilst inside a snow hole is a real possibility. It should be noted that an avalanche can occur on a slope with an angle as little as 20°! The Scottish Avalanche Information Service or SAIS is the one-stop-shop for mountain snow conditions and should be adhered to prior to heading out.
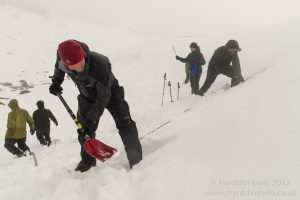
An avalanche probe should be utilised to test for any discrepancies within the snow pack, feeling for any excessively hard snow with wind slab (hard packed freshly-blown snow) lying on top. An avalanche pit is also a useful tool to get an idea of the local stability within the different layers in the snow. A hidden layer of Graupel (when snow is rotated in storm conditions to form ‘ball bearings’) under wind slab can act as lubrication for any subsequent snow layers, increasing the risk of avalanche.
Choice of Snow Hole
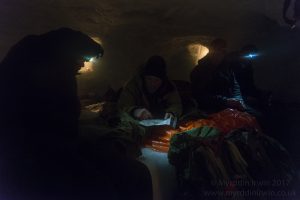
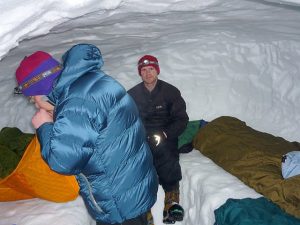 Temperature will dictate which style of snow hole is more relevant. In Scandinavia and the Arctic regions, a ‘Kaloo’ or traditional Norwegian set up is the preferred choice. The idea is to dig a corridor straight into the snow pack and leave raised sleeping platforms either side. This has two distinct advantages: The first being that it keeps you closer to the top of the cave, where the warm air from body and stove rises. The second is, as the cold air drops to the floor, it is allowed to escape through the doorway, which is in line with or often lower than the sleeping platforms – in effect acting as a cold sink. The roof has to be perfectly smooth and rounded to support the weight of the snow being exerted from above and the sides. In warmer climates, however, the Kaloo is prone to collapse.
In the British mountains, where the ambient temperature rarely drops below -10° and is more than often in the -1° to -7° range, it is more important to try and hold onto some of this cold air to stop the inner surface melting and dripping onto you. In this case, a snow cave may be more appropriate. This can be dug quickly by two or more people. Set at a planned distance apart, two doorways are dug in unison and joined once inside. The sleeping spaces are on the floor which encourages the retention of the cold air and expulsion of any warm air quickly. Once either type of snow hole has been dug, the doors can be capped from the top downwards by cutting blocks from above the chosen site and sliding them into place.
Carbon Monoxide
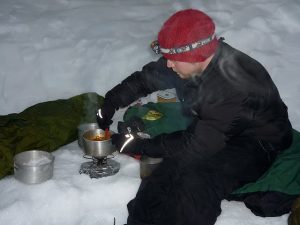 Believe it or not more people succumb to Carbon Monoxide poisoning than by the collapse of their snow hole. Carbon Monoxide is produced from using a gas or petrol stove in an enclosed space and is formed when there is not enough Oxygen to produce Carbon Dioxide. Two essentials are needed to counter this. The first is a small hole punched through the roof with a ski or walking pole to allow the Carbon Monoxide to escape (CO is slightly lighter than air). The pole is left in place to clear any spindrift that may accumulate during the night. The second is a candle, (apart from the obvious extinguishment of the flame telling you that there’s not enough oxygen for the flame to burn) which should be slightly flickering to confirm there is a small amount of air circulation throughout the sleeping space.
Equipment
 As we all know the mountainous regions of the world are amongst the harshest and unforgiving environments on the planet. The old adage of “there’s no such thing as bad weather, just bad equipment” holds true! Apart from having the usual ice-axe, crampons, water proofs, map, compass, weather reports and spare clothing, you should be equipped with an avalanche probe, snow shovel, bone saw, a good 4-season sleeping bag and bivvie bag, a reliable stove and most important of all…. good quality training.
Kit
Whilst staying out overnight the correct sleeping system has to be used depending on the weather, type of shelter being used and clients experience and expectations.
A full weather forecast including Synoptics is carried out in advance of a course running . When taking clients that I have not worked with before or with no background in Survival skills I will usually insist that they use a bivvy bag and 4 season sleeping bag. Where possible a synthetic sleeping bag is preferred to a down bag. Apart from the well known fact that down when wet loses it insulation, I have found that clients do not look after down bags in the way they should and, as a result, the bags have lost all of their loft. I know from trips to the Alps, Norway and Siberia that you should never use a down bag for any longer than two weeks at a time as the down gets compressed, damp and losses its heat retention.
Bivvie bags are of paramount importance. The Bivvie bag provides a water proof barrier between the outside environment and the sleeping bag. The bag itself should be made of a breathable material such as Gortex or Event to avoid a build up of moisture on the inside surface. It is common for ill informed clients to turn up with a plastic survival bag, this of course doesn’t allow the free flow of moisture to the outside surface and the result is a damp sleeping bag and in turn a wet and uncomfortable experience.
 There is no margin for error when selecting a sleeping system when Snow holing or in an arctic environment. The majority of heat will be sucked out through the ground, the first law of Thermodynamics states- “heat dissipates from warmth towards cold”. This is to say that any warmth that you create is always trying to escape towards a cold source. The largest surface area for this warmth to escape is whilst you are lying down on an extremely cold surface. Modern day advancements have come up with the thermorest where by you fill an inflatable mattress with a poor heat conductor – air. A roll map that traps air within its body is also valuable. When in an emergency situation vegetation such as Polytrichium (star moss) bracken/ferns and spruce and Fir can be used. A highly effective technique is to cut a large amount of Spruce to the length of your fingers to your elbow, sharpen the stem and insert into the ground in an upright position. Continue this in rows and columns until you have a space large enough to lie down on. As you lie on the upright spruce they are bent down and come to rest on their neighbour thus creating a mattress with air trapped underneath leaving you off the ground.
It is impossible to tell how someone’s body and mental state will react to sleeping out in adverse weather conditions ie. Getting wet during the night or waking up in the woodlands in minus zero degree temperature, hypothermia and other cold injuries are a real risk. For the sake of health and safety they must bring everything on the kit list, this will include spare warm clothing. If the weather permits it we can always thin gear out before the course starts.
One of the most common mistakes I have seen is to wear a cotton base-layer. Cotton and man-made fibres on the whole tend to absorb the water and not release it leaving the wearer sodden, and as discussed previously water is exceptionally good at conducting transferring warmth away from the body at an 80% greater rate than the likes of wool. We as humans have been creating and manipulating fibres for the past 20,000 years, nature has been at it for over 40,000,000 years! The best advice to give to beginners is to use a man-made wicking fibre (usually Full of holes to help with heat retention) and a number of wool layers (which in itself is a natural wicker) depending on thWool when wet holds some 70% of heat that the user emits and thus is a supreme insulator.

During the final Jacobean uprising, culminating in the battle of Culloden in 1976 the Government troops were guided through Moray-shire and Inverness-shire by clans loyal to the Hanoverian royal family. In John Prebbles book “Culloden” he states that the English soldiers were amazed when the Highlanders in freezing weather dipped their kilts and plaids in to a stream and continued to wrap themselves up in it to sleep. This isn’t as crazy as it seems. By wrapping themselves up in wet wool meant that they lost very little insulation and when the material froze it acted as a wind proof shield.
Similarly Mallory, who perished on his attempt on Mount Everest, adorned tweed climbing ‘outers’. Of course tweed is made from wool which is insulative but modern day studies have revealed that the tweed stored heat when the wearer was warm and as the wearer cooled down released heat back to him!