


 What safety equipment do you guys carry with you when you’re out in the nature? Whistle, orange survival bag, foil blanket, head torch, first aid…….check! How many of you carry a group shelter or “bothy bag”? Running courses in the Highlands of Scotland, we would put a conservative number of our clients turning up with one at 50%.
“But I always carry an orange survival bag with me, this does the same thing right?” Yes and No, we’ll come back to that argument in a second!
Cast your minds back to School (daunting I know), now remind yourself of the 4 main ways the body loses heat…..here’s a quick reminder;
Radiation – We are constantly radiating body heat to the external environment, the 2nd rule of thermodynamics states that “heat passes from a warm source to cold, to try and reach an equilibrium”. This is why we wear clothes right? The clothing basically stops the heat dissipating from our body quickly, and traps warm air against our skin.
Conduction – Same as above, if you lie, lean or make contact with a colder surface than your body temperature, you will lose heat to that cold source. Hence why we use sleeping mats/thermorests.
Evaporation – As we all know sweating is natures way of losing heat as quickly as possible when we are trying to achieve “Homeostasis”, the act of balancing our body temperature with the outside climate. This is paramount in hot climates or when exercising. However evaporation can be one of your biggest enemies when you are soaked with rain or sweat and are stationary. Your body warms the water particles against your skin, turning the water into vapour, and carrying heat and energy at quicker rate than air away from you.
Convection – In an outdoor setting convection is “wind chill”.We’ve all been there, hanging out your hoop, overheating going up a steep hill, then you get to the top you rest for 5 minutes all the while getting hit by the wind, you wish you were on the move again! The wind moves heat away from the body at a faster rate. (This shows the importance of the layering systems in clothing) Below is a wind/temp conversion chart.
 This goes to show you that it can be 10 degrees, but with a 30mph wind, it’ll feel like -1!
The Gruesome Twosome
In the majority of hypothermia cases in the outdoors it’s very rarely just the one heat loss mechanisms that does the harm, usually a mix of two or more. The real problem is when individuals get wet, either through sweat or rain/snow (Evaporation) and there is a significant wind chill (Convection). Evaporation+Convection = Big trouble! This is when the “rule of three’s” comes into force, without adequate protection from the elements you’re going to last a maximum of 3 hours before the symptoms of Hypothermia are so bad…..it’s probably too late.

Lunchtime in the FR Windsack 3
Group Shelters and the Fjallraven Windsack 3
Like most things in life it’s the simple things that can make all the difference. The fjallraven Windsack 3 and other Group shelters are basically a tent material that can fit individuals, or a number of you in and keep you sheltered from the elements. Group shelters aren’t just a survival piece of kit, but can also be used to have your lunch in, if you can’t get out of the wind.
So looking back at the 4 mechanisms of heat loss the Wind sack 3 and group shelters will stop;
Radiation – Fjallraven use the same materials as the outer on their tents (40D TripleRip nylon) , this means that any radiated heat is trapped in the bag itself and is allowed to freely circulate. This is even more evident when there are two or more of you in there, the temperature will noticeably rise quickly
Conduction – When using a group shelter, ruck sacks should be placed on the ground and sat-on to stop conduction to the ground.
Evaporation – Ok, so a group shelter won’t stop the act of evaporation, however the heated vapour will be trapped in the bag itself to avoid excess heat loss. The great thing about the wind sack 3 is the three individual zippers, which allow airing and stop excess condensation on the inside.
Convection – You’re still going to feel the wind if it’s strong enough in a group shelter, but it’s not going to be able to draw the heat away from you at the same rate.

A miserable way to spend a night, but will save your life.
As was stated above “an orange survival bag does the same thing”, yes it does, but can only really be used once and is a “one person shelter”. Don’t ditch the orange survival bag, just make sure you carry a group shelter with you from now on.
It’s worth noting that the orange survival bag should be pulled over the head, with an “air hole” made for breathing/avoiding condensation (pictured). This will assure radiated heat is trapped in the bag with you.
Most group shelters will come in bright colours, this is obviously so rescuers can spot you, should you need to deploy it “in anger”, the Wind Sack 3 comes in UN blue. The two colours that are unnatural and are picked up easiest by the human eye are Orange and UN blue, so when buying a group shelter bear this in mind.
Two other great features of the Wind sack 3 that we’ve noticed are the reflective tape around the outside….easily picked up at night, but also the carabineer on cordage (pictured) that you can attach to you in high winds (those of you who use a group shelter regularly will know all about the potential for the wind to rip it straight out your hands!)
Let’s be honest here, many of you will be on a budget and might not be able to afford the Wind sack 3 , however a trip to any reasonably reputable outdoor shop and you’ll be faced with a wide range and at a reasonably cheap price.
Don’t just take our word for it, here’s an incident that happened this winter in the Cairngorms

 Be it necessity or leisure, the snow hole is in many cases the most effective form of shelter within a winter mountain environment. Yet unlike woodland shelter, there has to be a lot more judgment and understanding of the building medium and topographical features to avoid an unpleasant or in some cases be a potentially fatal experience. The snow hole has been an essential means of survival for many over the years – from indigenous communities; the famous Heroes of Telemark; to present-day mountaineers.
 Think you won’t get avalanched in Britain? Think again! Being avalanched whilst digging, or worse being buried whilst inside a snow hole is a real possibility. It should be noted that an avalanche can occur on a slope with an angle as little as 20°! The Scottish Avalanche Information Service or SAIS is the one-stop-shop for mountain snow conditions and should be adhered to prior to heading out.
 Temperature will dictate which style of snow hole is more relevant. In Scandinavia and the Arctic regions, a ‘Kaloo’ or traditional Norwegian set up is the preferred choice. The idea is to dig a corridor straight into the snow pack and leave raised sleeping platforms either side. This has two distinct advantages: The first being that it keeps you closer to the top of the cave, where the warm air from body and stove rises. The second is, as the cold air drops to the floor, it is allowed to escape through the doorway, which is in line with or often lower than the sleeping platforms – in effect acting as a cold sink. The roof has to be perfectly smooth and rounded to support the weight of the snow being exerted from above and the sides. In warmer climates, however, the Kaloo is prone to collapse.
 Believe it or not more people succumb to Carbon Monoxide poisoning than by the collapse of their snow hole. Carbon Monoxide is produced from using a gas or petrol stove in an enclosed space and is formed when there is not enough Oxygen to produce Carbon Dioxide. Two essentials are needed to counter this. The first is a small hole punched through the roof with a ski or walking pole to allow the Carbon Monoxide to escape (CO is slightly lighter than air). The pole is left in place to clear any spindrift that may accumulate during the night. The second is a candle, (apart from the obvious extinguishment of the flame telling you that there’s not enough oxygen for the flame to burn) which should be slightly flickering to confirm there is a small amount of air circulation throughout the sleeping space.
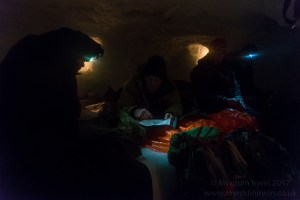 As we all know the mountainous regions of the world are amongst the harshest and unforgiving environments on the planet. The old adage of “there’s no such thing as bad weather, just bad equipment” holds true! Apart from having the usual ice-axe, crampons, water proofs, map, compass, weather reports and spare clothing, you should be equipped with an avalanche probe, snow shovel, bone saw, a good 4-season sleeping bag and bivvie bag, a reliable stove and most important of all…. good quality training.
 There is no margin for error when selecting a sleeping system when Snow holing or in an arctic environment. The majority of heat will be sucked out through the ground, the first law of Thermodynamics states- “heat dissipates from warmth towards cold”. This is to say that any warmth that you create is always trying to escape towards a cold source. The largest surface area for this warmth to escape is whilst you are lying down on an extremely cold surface. Modern day advancements have come up with the thermorest where by you fill an inflatable mattress with a poor heat conductor – air. A roll map that traps air within its body is also valuable. When in an emergency situation vegetation such as Polytrichium (star moss) bracken/ferns and spruce and Fir can be used. A highly effective technique is to cut a large amount of Spruce to the length of your fingers to your elbow, sharpen the stem and insert into the ground in an upright position. Continue this in rows and columns until you have a space large enough to lie down on. As you lie on the upright spruce they are bent down and come to rest on their neighbour thus creating a mattress with air trapped underneath leaving you off the ground.