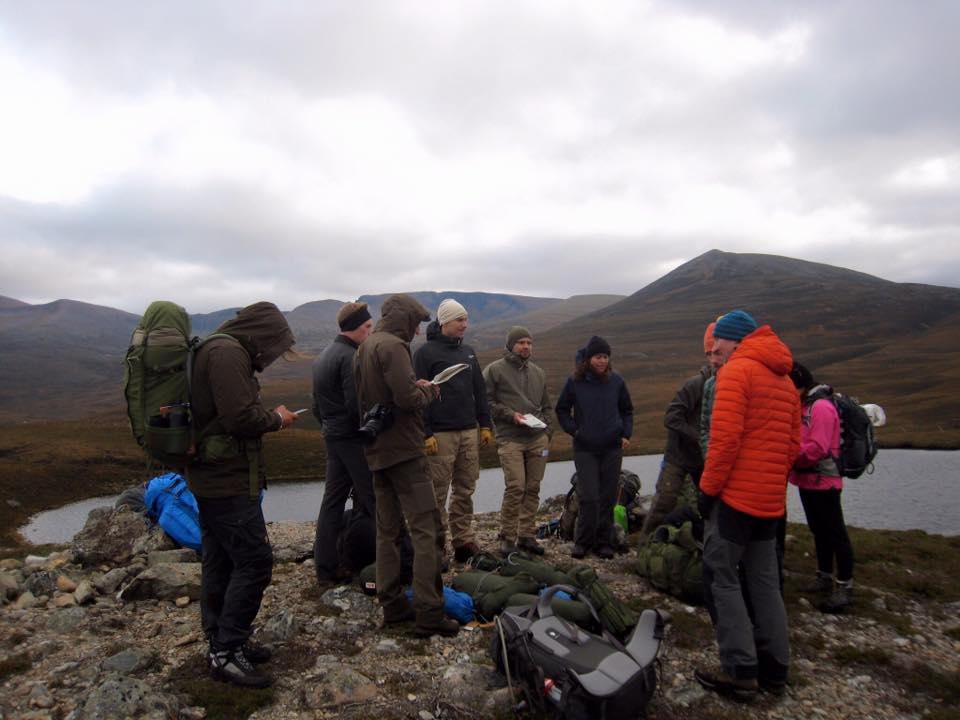
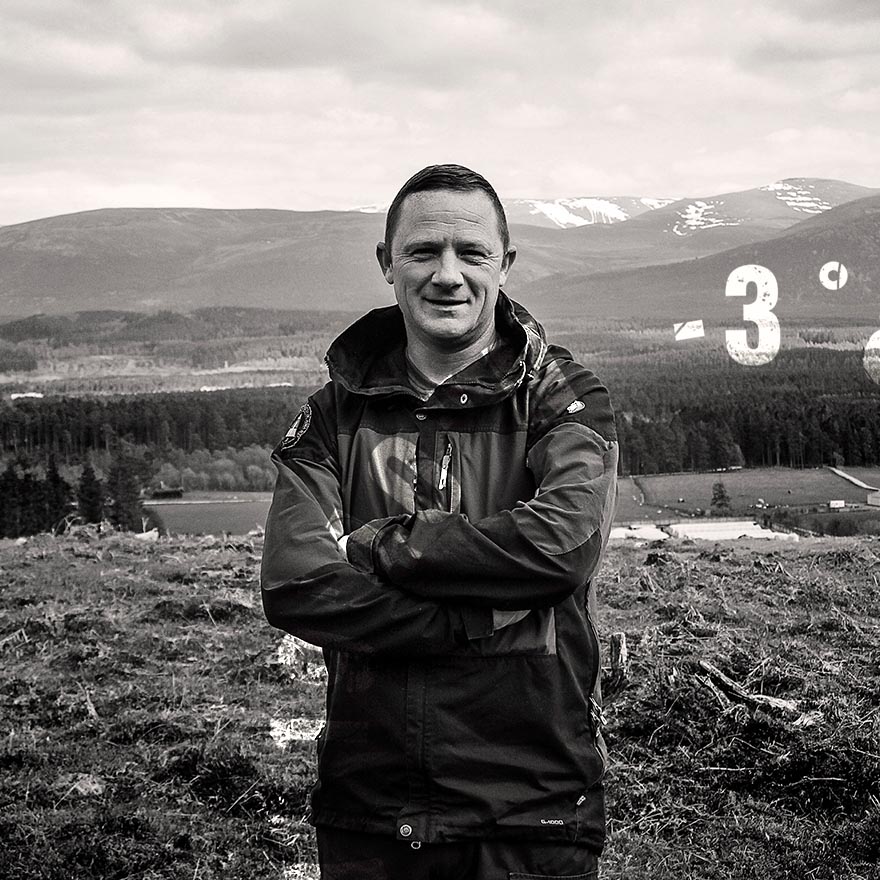
Andrew Wilson from Fitnique link to his business here came on our last exped skills course…..this is what he has to say about it;
I tend to overthink and prepare for every eventuality no matter how slim the occurrence of the event happening; I do this regardless of the adventure. Initially I was looking into survival course. After all, if you can survive by building your own shelter, making fire and sourcing food you need to pack very little; less overthinking perhaps.
This adventure, therefore, was to learn how to plan and focus on the necessities. Undertaking this course both filled me with excitement and dread in equal measure. After a conversation with Neal, owner of Back Country Survival, an expedition course appeared to be more suited to the outcomes I desired. The excitement quota rose a little and dread subsided, a little! I paid my money and committed.
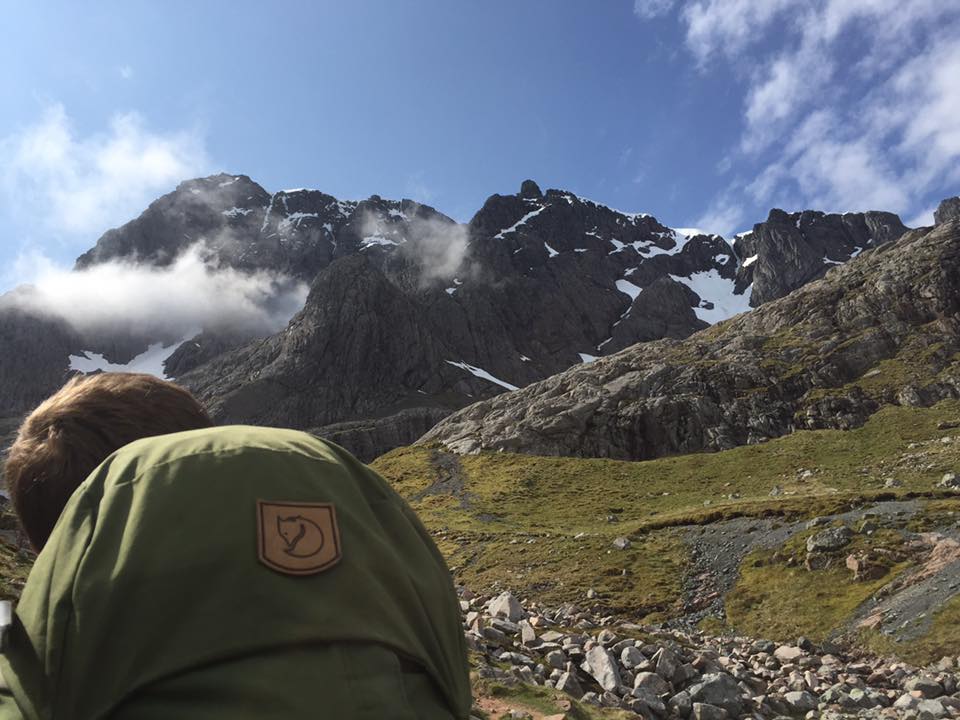
This expedition course would be a three day, wild camping adventure in the Cairn Gorm National Park and take in the ‘4000s’, four of the highest peaks in the UK including Ben Macdui; second only to Ben Nevis.
Kit list downloaded and the fun began. What did I already have and what could I reuse? Researching required items that would see me through the weekend and last for years to come. I’m of the opinion that if you buy cheap you buy twice. There is a price point that makes both practical and financial sense and where I would get reuse in my Personal Training. Having booked the course before my trip to Switzerland I knew many items would have two uses by the time the expedition course was finished.
Day 1 – Arrival at Alvie Estate
I get nervous, not sure why but I do, and was nervous pulling up to the car park. Neal was already stood waiting and had seen me drive hither and thither around the estate, a great first impression, couldn’t even navigate to the right place meeting point! Introductions done, we talked about my car and my mind started to settle. I grabbed my kit out and joined the group.
Preparation
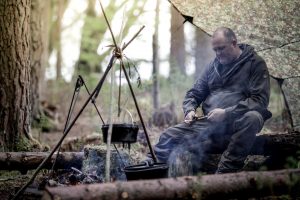
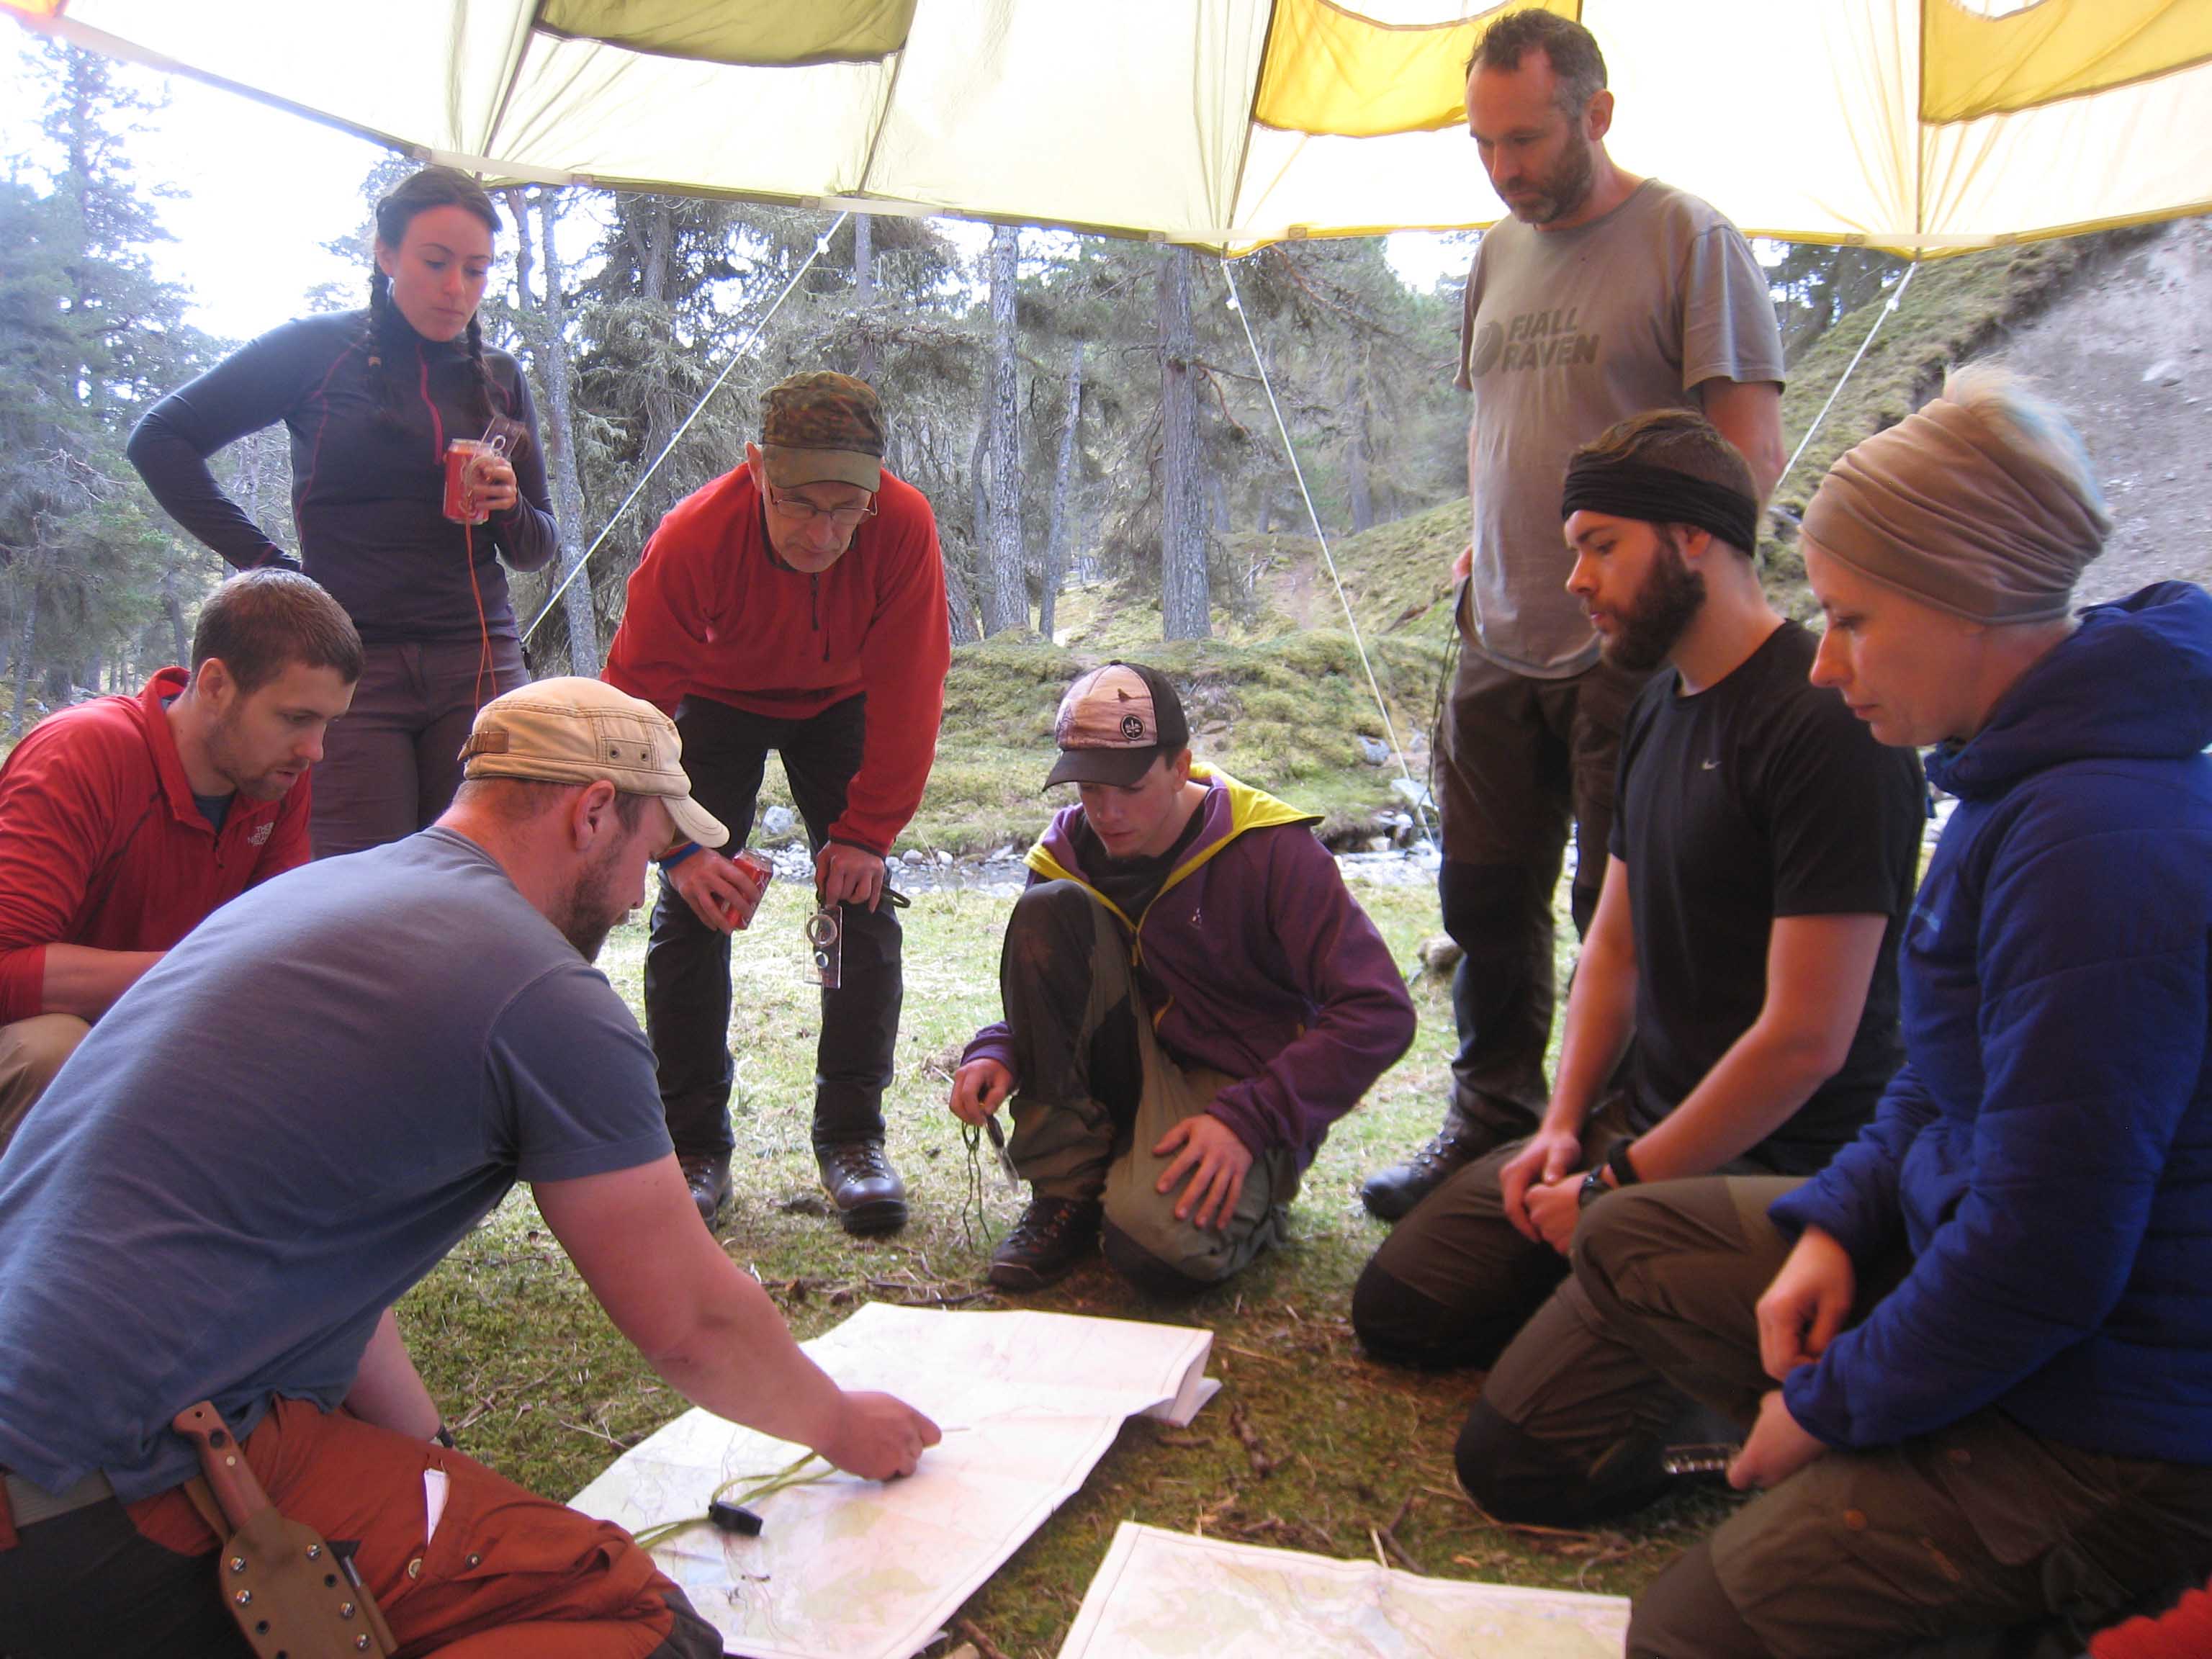
The first part was to review kit, rucksack packing essentials and optimum order for ease on the trail. Map and compass navigation basics next and Naismith’s Rule on route planning and timings. Finally weather forecasts and synaptic charts. Then, most importantly, kettle on and a brew. No adventure should start without one.
Then a quick tent pitching test… I took both a tent and a bivvy bag. The latter because I wanted to experience the true outdoors and the former because… well I panicked!
As luck would have it Trevor didn’t have a tent so we agreed to use my tent and split the sheets and poles between us. My panic was, therefore, amazing foresight!
We All checked and prepared and fed on our first experience of dehydrated food we loaded up the truck and headed off to the Cairn Gorm Ski Lodge car park.
The adventure begins
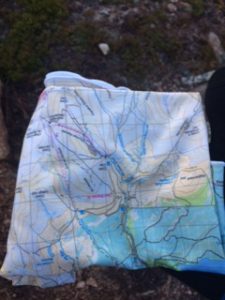
Orientation and map and compass work to understand and put into practice the briefing items. A lot of what I had learned in scouts a short thirty years earlier was clawed from distant memory. The practical teaching made perfect sense and made it easier to understand than I ever remember. Maybe I’m older and pay more attention than I did in scouts!
Once oriented we started off on the tourist trail to the top of Cairn Gorm checking our position and bearing on the map, reading physical contours and landmarks, every one hundred metres or so. This practice and frequency in the initial stages would pay dividends over the next couple of days.
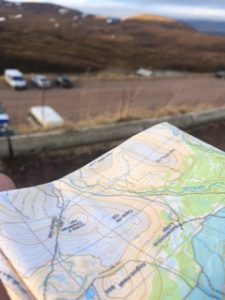
After a quick stop at the Ptarmigan café, the last piece of real civilization we would see, we forged on up to the Cairn marking our first summit. This felt good, even being passed by tourists wearing t-shirts and trainers. Tourists went back down the way they came up, we headed over the top; quick bearing check and onward.
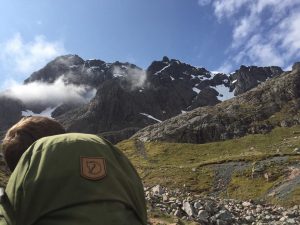
Stopover one – the real adventure
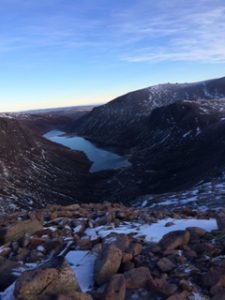
So much for sunny weather predicted by Mountain Weather information! Our descent over the other side of Cairn Gorm continued into mist and rain. The weather persisted as we made our way to the first overnight camp site. It persisted while we pitched tents.
As the rain relented we explored our surroundings, a plateau on the back of Cairn Gorm at Coire Domhain. We were visited by a herd of Reindeer who were particularly, and surprisingly, tame; the survival course, I imagine, may have eyed them up for dinner. 
Not us, rehydrated rations the dish for this evening in the rain. The adventure was on.
When the rain relented again I made my move to the bivvy bag. My sleep ‘system’ included an airbed, sleeping bag all enveloped in my Alpkit Hunka XL. My head adorned by my midge net I asked myself ‘how bad can this be’. The answer was provided by another swift downpour. My response was to pull all draw cords and envelop myself completely inside. A situation which only resulted in minor claustrophobia and, when I released myself, rewarded me with a starlit sky between showers. I’m pretty convinced the reindeer had grazed through the site during the night; either that or some pretty uncanny snoring and grunting resembling them, not mine I hasten to add.
My sleep only interrupted by rain on the face and resealing and releasing process through the night. At 6:45 I woke naturally feeling relatively cosy to the bright yet misty grey morning. It was only then I realised I had left my boots outside the tent ‘porch’ during my hasty bed time transition; they were quite damp.
Stoves on, water boiled, dehydrated granola and strawberry. Yum. It was hot and welcome.
Day 2 – A big day ahead
Camp struck and packed back into our mobile homes the order of the day was more intensive navigation, pacing and timing, and individual challenges. The repetitive checking and re-checking on day one had bedded in the basics.
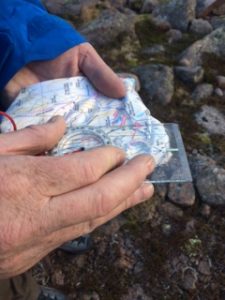
Neal set us each a point on the map to navigate to. Our task was to work out the time it would take and, if less that 500 metres, count our pacing, identify the relief of the land to arrive within a few meters. Once we had arrived at the check point the others would then pin point on the map, based on the bearing time taken or metres covered, contours, features where the other was aiming for.
We repeated this process as we made our way to Ben Macdui, the second highest peak in the UK. The navigation even more challenging as the mist reduced visibility to no more than fifty metres or so. This made the practice of understanding the contours, checking timings and the near distance features ever important.
First big one
Slowly the cairn came into view and at 1309m the outlook was… misty! It was time for a celebration, home made flapjack and some nuts to sate the appetite. 
Our breaks were relatively short and enthusiasm high to keep our adventure on track. As a result we continued our descent down the rippling south side of Ben Macdui toward the foot of Carn a Mhaim. As we descended the weather started to break, patches of blue appearing and the wind dropping. In a sheltered spot above the valley floor we took a rest, checked feet, soothed and patched blisters. Water was collected and boiled to make lunch. A beautiful rehydrated chicken tikka for me and a cup of tea, more nuts and flapjack.
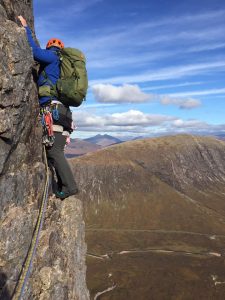
We left our packs to make the quick return trip along a knife edge ridge to the top of Carn a Mhaim. Standing at 1037m this peak provided a view to the west of our next four 4000’s; the challenge, the beauty and the awe within which one stands absorbing that the land under our feet has been sculpted over millions of years.
Day 2 – Post Lunch
Swinging the pack on my back felt so heavy after the unloaded walk yet somewhat welcome. We retraced our steps to Allt Clach nan Taillear, a steep tributary creek flowing fast from Ben Macdui. The ground was wet, mossy, heather covered with no distinguishable path. Our steps zig-zagging over the slippery ground in order to reach the base of the valley where the Taillear feeds the River Dee.
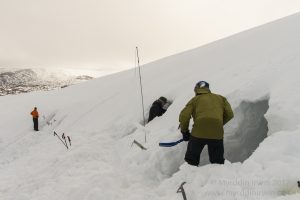
Neal had warned us of the magnitude of midges at our next checkpoint, Corrour Bothy, a frequent stopping point for hikers, climbers and adventurers. He had also said we wouldn’t be stopping long due to their voracity. To this point we had not been too bothered by these mini munching machines; that would all change from this point.
Frankly I have never seen so many. Clouds moved in unison seeking out their prey. In contrast to those pitching camp for the night our stop was, maybe, three to five minutes. Favouring to move to our overnight stop on the shoulder between The Devil’s Point and Cairn Toul where the breeze would keep the midges at bay. This section was a steep climb aside another tributary; when the wind dropped the clouds of carnivorous winged beasties emerged. My energy kept up by the desire to not get eaten alive. All part of the adventure I guess!
midge attack!
Finally, the plateau emerged and we looked for a suitable site. It was incredibly still, little to no wind, humid, and the return of swarming clouds. Clothes zipped up, midge nets on and a good dose of deet on exposed parts as we attempted to put our tents up. This was a stop start affair, hands blackening as the blood suckers landed and died in the sticky defence barrier. The wind would pick up a little and they would quickly disappear.
A decision was made to pause the perfecting of guy ropes and camp aesthetics and walk up The Devil’s Point. As we started the ascent the wind increased and the removal of midge protection provided a clear view, fresh air and respite from being their dinner. Taking fifteen minutes at the top to soak up the surroundings we supposed it was time to return. We had to at some point and hoped the breeze was more constant at camp.
Thankfully the wind picked up and prevail for the evening so we could eat rather than being eaten. I decided to share my tent, more concerned with being eaten than getting wet. There was still one more day to go and it would have been unfair for the others to have to carry my kit and midge stripped skeleton the rest of the way!
We stood and chatted after dinner, global politics, local politics, work, plans. The only missing a good pint. Though we had the great idea to create dehydrated beer… I’m surprise no one has yet!!!
Day 3 – Final day 4 x 4000 to go
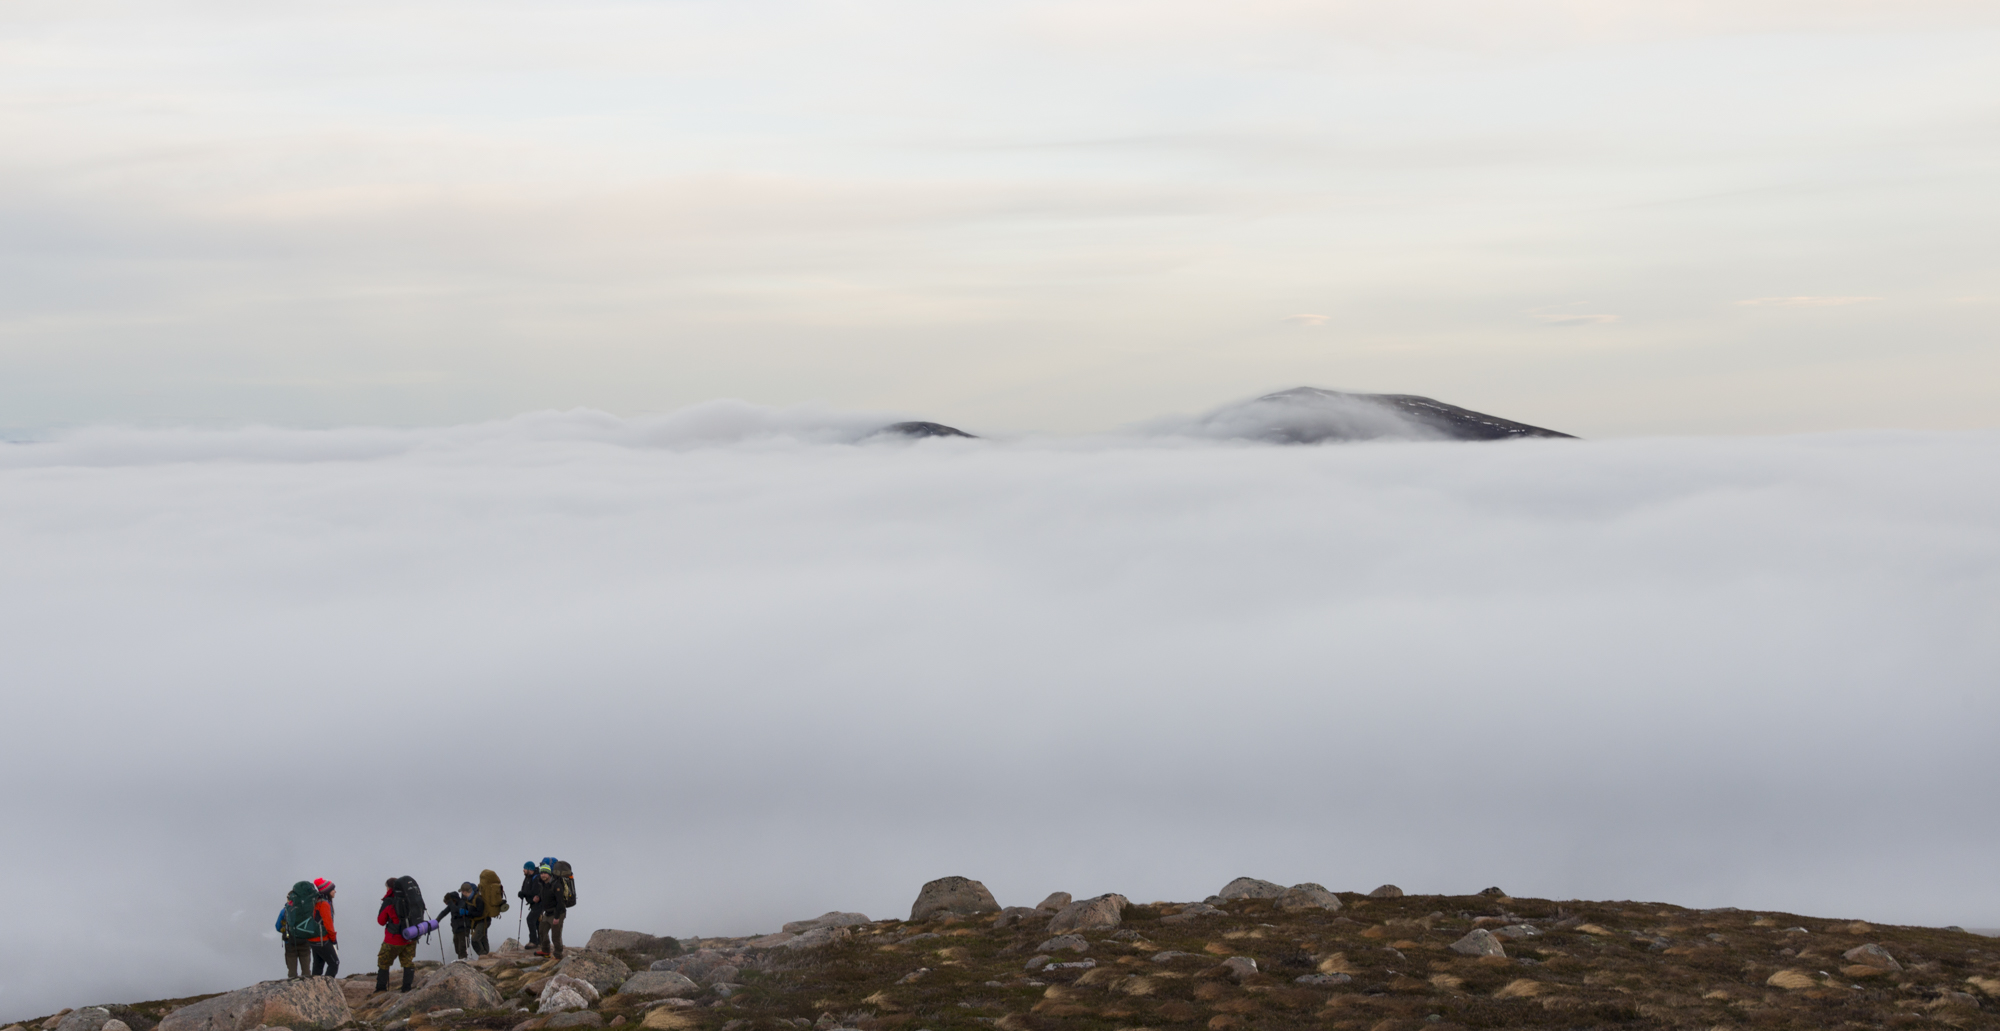
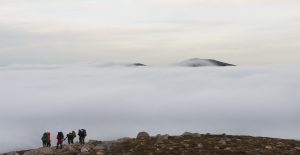
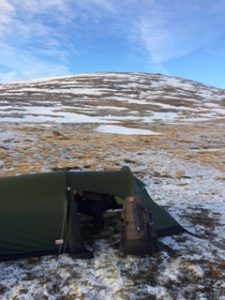
I slept well, warm, dry, cosy. I awoke to this…
Everything felt good in the world.
Breakfast, porridge. I have to say the dehydrated expedition food I had was really quite nice. Tasty, high calories and hot.
We set off, early again but fresh, rested and refuelled. Today we take in Cairn Toul, The Angels Peak, Carn na Criche and Braeriach. To lock in navigation skils Neal set us a few additional challenges. This would server to identify any outstanding questions or misunderstandings.
The weather was misty, windy but dry. The climb boulder strewn and the drop to our right significant. The latter a useful tool, however, enabling us to ‘handrail’ the edge whilst following our set bearing and check our timings.
Energy, whilst plenty expended, was high. Our pace was quick and we were flowing.
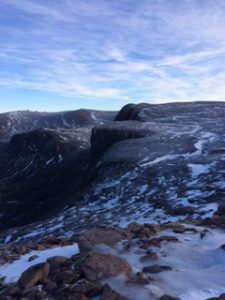
The climb to Cairn Toul tricky over large boulders we handrailed around the top to The Angels Peak and Carn na Criche then dropped down to the Wells of Dee. The Wells indistinguishable from the distinct pools on the map highlighting the importance of centring yourself in the landscape, features and physical contours and then identifying specifically where you are on the map. Completing Braeriach done before lunch was a major milestone. The weather showed promise of breaking and it would provide a 180-degree view of our adventure so far and yesterdays peaks.

We could then find shelter for food.
Day 3 – the final push
A long hike on well trod paths to the adventures end. A relaxation of map reading notwithstanidng riosity and personal interest in where we were.
We headed further down, paths enhanced with steps by the local volunteers; presumably to make access easier, though I thought it made the going more difficult. Pace, step, pace, step, no rhythm, no flow.
The path winding us down into Lairig Ghru, steep sides and more steps though unnavigable without them. Deep into the dense green valley where the water ran freely and provided a fast-flowing refill point. Steps up the other side to a path that was almost pavement like in construction. Barren landscape with the odd pine trying to take hold and absorb any nutrients it could from the ground.
a reminder of the dangers
With the flow returning we made good speed until the path ended and we entered the jaws of Creag a Chalamain. High cliffs on either side, overhanging in places. The deposits of many years of rock fall in the valley, climbing obstacles and scrambling. 
A Coast Guard helicopter landed above us, training drills with mountain rescue underway. It did a couple of loops, a slow hover and descent. You’re glad the service exists and equally never want to see them up close because that means something bad has happened

Exiting Chalamain placed us back on the path, a flowing walk to the finish. We made good time, ahead of schedule so gave ourselves a few minutes rather than waiting in the midge infested car park better to sit atop the last ridge with a view back to ski centre car park at the beginning of our journey. Soaking up the sunshine and reflecting for a moment.
A short walk found us to the rendezvous, there was a little banter, some awe of our collective and individual achievements and relative quiet as we loaded the truck and drove back to the estate.
Physical versus mental
Inability to complete the adventure does not create my nerves and dread. After all I train regularly and have done many long events. My nerves and dread come from my inner voice casting doubt, telling me that I might have forgotten something, telling me that I might not be as good as I expected. The latter the biggest challenge, the level of expectation I put on myself versus those defined by corporate or social constructs. I want things to be right, perfect. Tell myself that failure is not an option yet know that we learn from failure. Instantly, I could find dozens of quotes and memes on the subject; I won’t, really not my style!
People talk about comfort zones. I am not sure they exist. The very definition of adventure is to undertake an unusual and exciting or daring experience. Adventures can be big or small, minutes to months. Our adventures through life define us as human beings, they shape us, create learning opportunities and shared experiences, new acquaintances and sometimes lifelong friends. They help us grow and all of that is true of my Scottish Adventure.


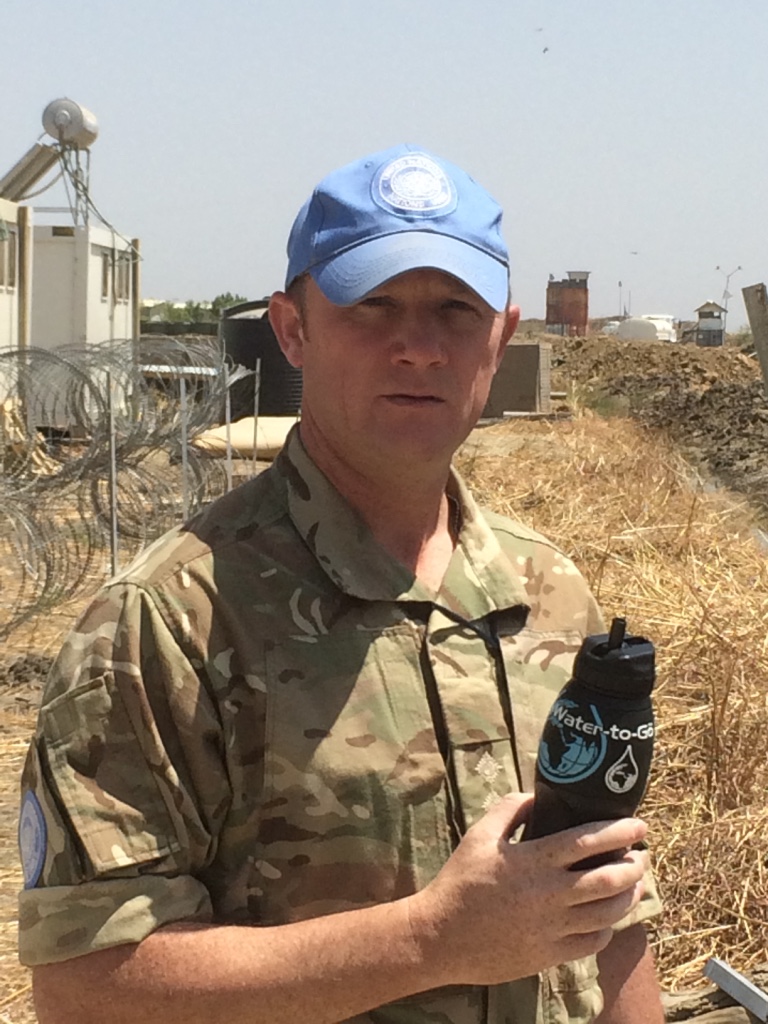
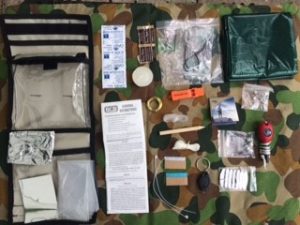
 At the beginning of this year BCS head instructor packed his bags for a trip to South Sudan as part of the United Nations Mission In South Sudan (UNMISS). As an engineer he was there to deliver engineering by way of construction (vertical & horizontal) to the mission. But this would be different, this would be a very austere environment so it was essential that he looked after himself.
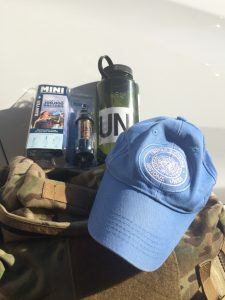
 One of the initial jobs for us would be setting up our own base and providing our own potable water using our own systems. The water was drawn direct from the River Nile which has every water borne disease in it known to man! It was crucial that we got this right. I was lucky enough to get some products from
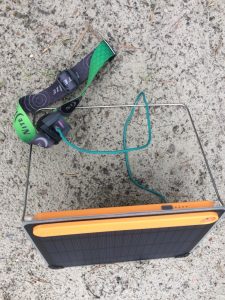
 So over the months i was there i found that the Fjallraven gear was really good in the heat as well as during the really humid and sticky evenings. The Greenland shirt was really good even though it is slightly heavier than the Abisko Cool but both kept me comfortable and cool as well as protecting me from the dreaded mosquitoes! The trousers were the same and having been subjected to several months of field washing in chlorinated water there was no fading or deterioration and they now have a very comfortable softness to them. I have used these items in Scotland in all seasons and it is amazing how versatile they are and usable in all environments!
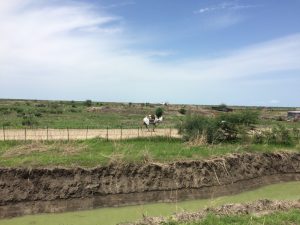 South Sudan is a land locked country but there is no shortage of water mainly because it has a long wet season as well as having large areas of swamplands. The White Nile runs through the middle of the country so getting water should be relatively easy!
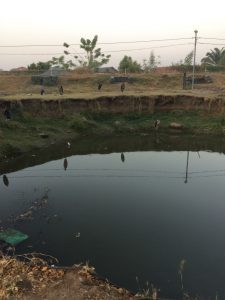 United Nation (UN) camps there is a massive requirement for clean water to not only survive but also to try and keep disease down. Where I was located in Malakal I was only about 2km from the Nile and I watched daily as women from the POC camp left to collect firewood and water. There were standpipes in the POC but with 50000 IDP in an area a little larger than 750m x 600m then the risk of disease is massive. All sanitation is either Deep Trench Latrines (DLTs) or a squat at the side of the road! Open sewers run throughout with children playing in the fluorescent green water. Cholera and E.coli are rife and a lot of the IDPs succumb to these diseases.
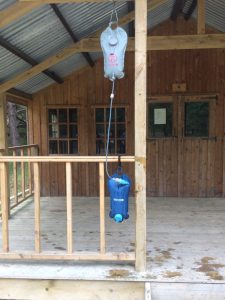 Firstly many thanks to Tony Male at Sawyer Europe for assisting me.
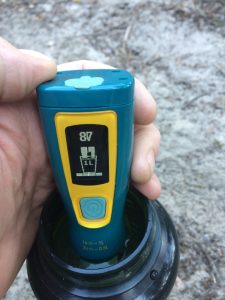
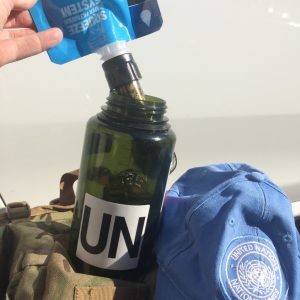 I dished a few of these out to the lads to use and in one of the locations where there was a raw sewerage leak in to the water borehole they pressed them in to action and all was well, however i digress. I conducted the same test as above with the EHT and again great results. The EHT’s were blown away by the filter and for the price and the quantity that can be filtered it is a winner every time and again is so small it is easy to pack away. My only dislike is the squeeze bag that comes with it as it can be a faff to fill but overall it is a great item.
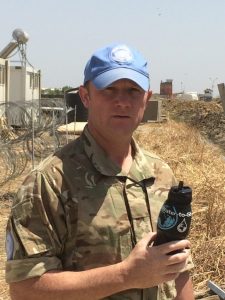 Firstly many thanks to Dave Shanks for assisting me.
 My final test was proper back to basics and it is one that is grass roots level simplicity. The good old canvas Millbank bag. I have used this endless times in many continents and i must admit that sometimes the old methods are the best.
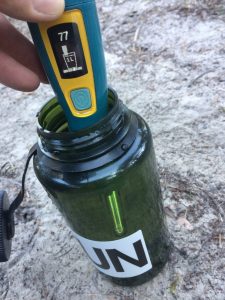


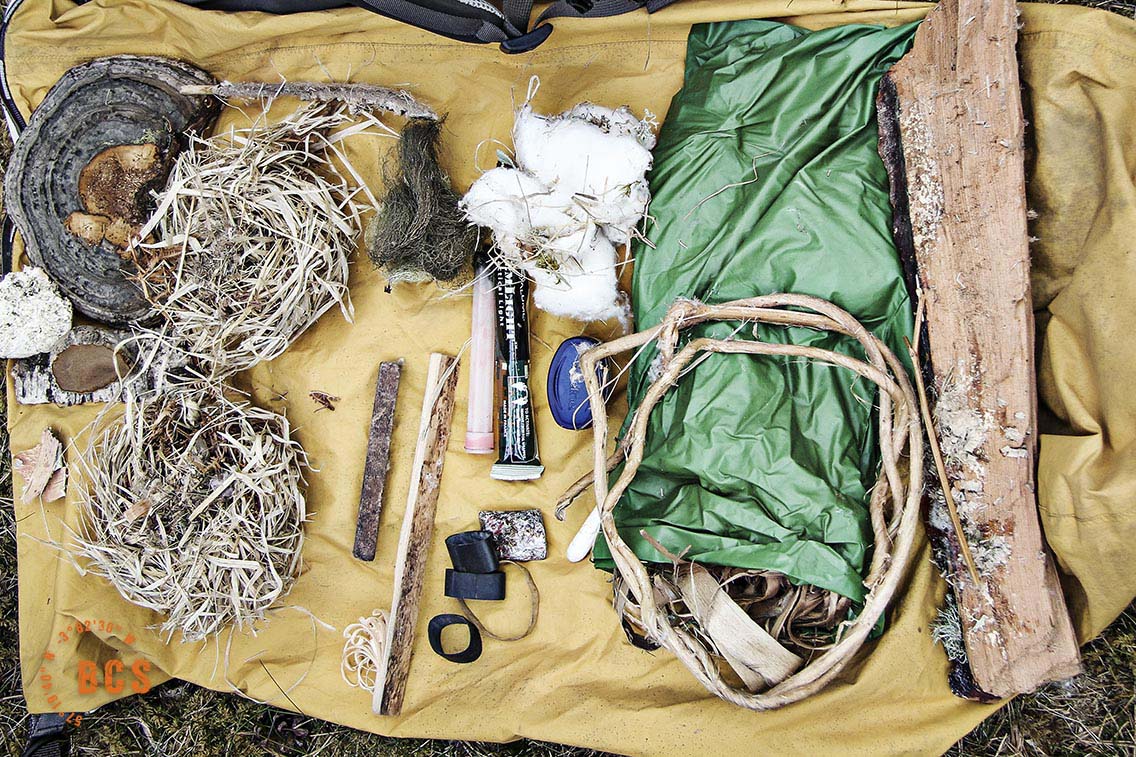
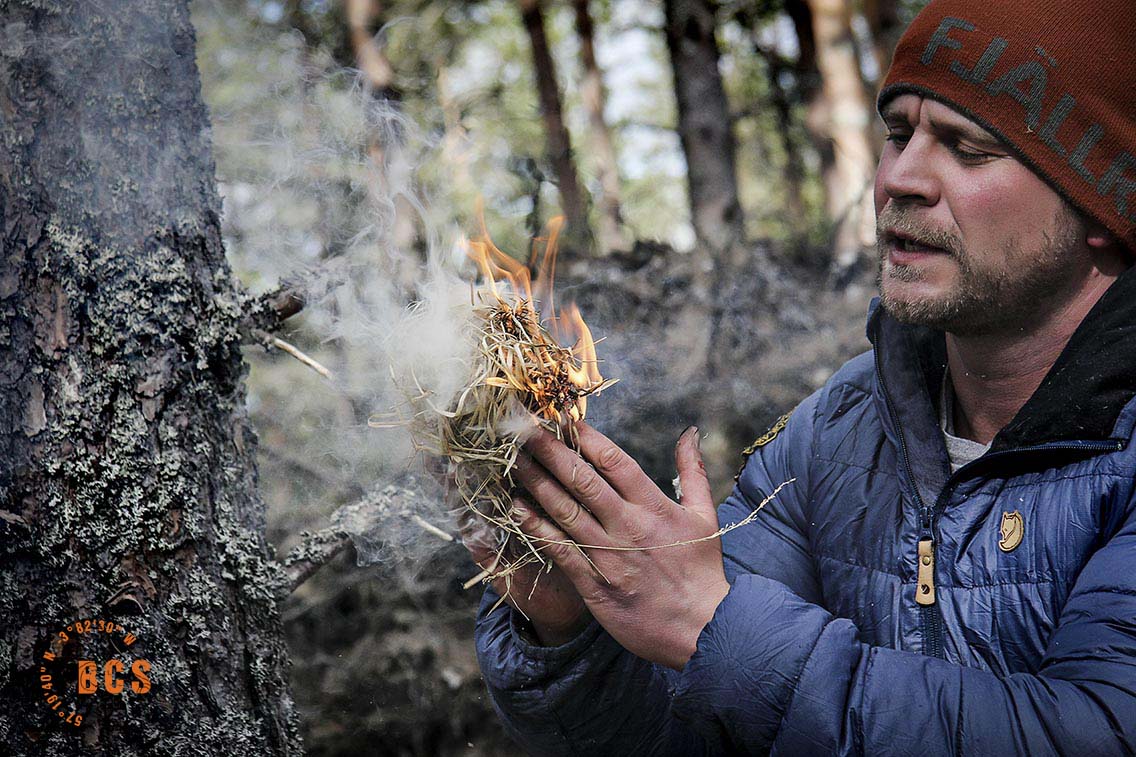
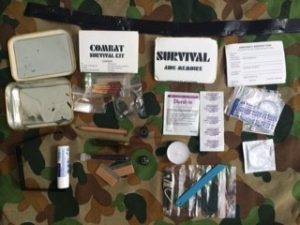
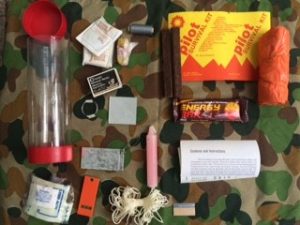
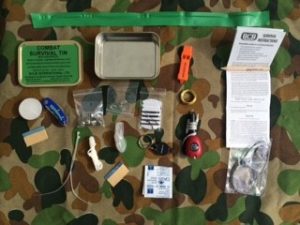
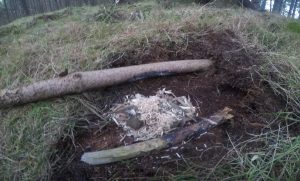
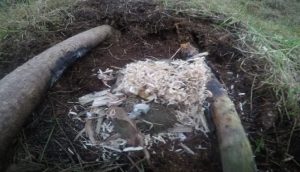
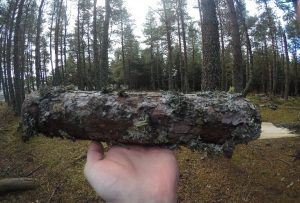 tice and be efficient with, as it could well save your life in a survival situation. I got thinking, I can light a fire in the woods with an abundance of wood at my disposal but what if I got in a life-threatening situation somewhere and there is barely or even no wood at all. I am a very keen Mountaineer and Munro bagger and I spend a lot of my spare time up in the hills where the tree line usually disappears about 600m. So, I decided to practice lighting a fire with just one piece of wood. Despite the title of this article being ‘One log fire’, it doesn’t have to be a log, it can be any one piece of wood. An example of this could be using petrified wood when you are up above 600m where there is next to nothing at your disposal. The picture below shows a piece of pine that I used for my Tinder, Kindling and Fuel. If you were venturing up higher than the tree line you could easily grab a small log and put it in your daysack if you were planning on having a small fire in the evening.
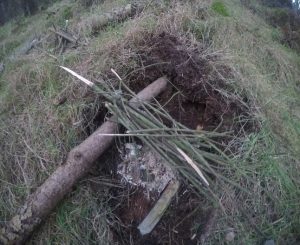
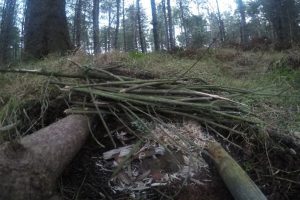
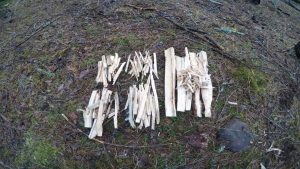 going to be using is sharp and in good working order. You then want to remove any bark from around the log, bark tends to hold moisture so removing it will make your life easier in the long run. Once the bark has been removed you want to find a decent Stick that can be used to baton the wood into the relative sizes needed. We still follow the size rule of Match stick, Pencil, Finger, Thumb and Wrist. This will obviously depend on the size of log used but the process of smaller pieces to larger should always be followed. As shown below, this is what your log will look like once you have finished the processing stages. I found that getting match stick thickness pieces from the log was tricky, so I opted to shave part of the log to get a decent pile of dry shavings to use as my tinder/ matchstick thickness sticks. The picture below right shows you the shavings rested on a platform which was also made from the original log. Some people will prefer using feather sticks to get the fire going and this will also work. You should go out and try both methods and see what works best for you. The picture below left shows you a few feather sticks which could also be used.
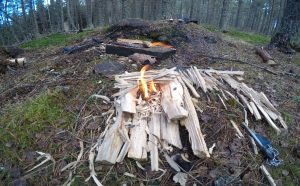
 Here at BCS we are serious about our Survival courses. As the only Survival company in the UK experienced and qualified to take our clients into the most remote regions in the British isles, you can be sure to learn a whole load whilst having a first rate experience. The Cairngorms is probably the only region in Britain where you are almost always assured snow, and we know where to find it!
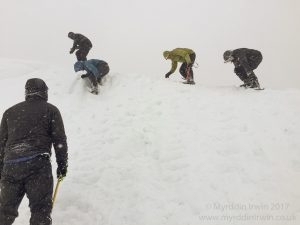 The final 3 day course this year will be running on the 10th – 12th of March and we have two places left to fill, which are going for £180 per head rather than the usual £310. If you are interested please send us an email or give us a call.
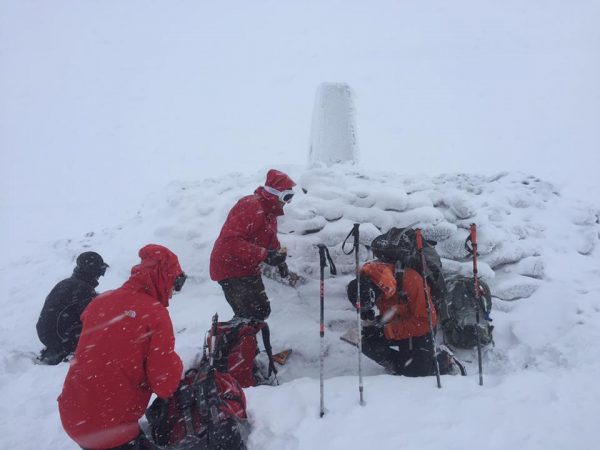


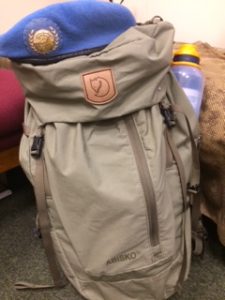
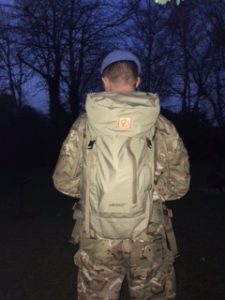
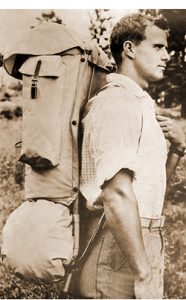 Ever heard of Ake Nordin? You’d be forgiven if you haven’t. Ake lived in a town called Örnsköldsvik in East Sweden, a keen scout and outdoors man that was not entirely happy with the rucksacks and outdoor equipment of the day. At the age of 14 and prior to a trip to the Västerbotten mountain range Ake borrowed his mothers sewing machine, and after knocking up a satchel made of strong cotton, attaching it to a wooden frame (he knew that carrying equipment on his back required it to be close to his back with a high centre of gravity) he had produced one of the first multi-day hiking rucksacks.